 Velo Workspaces
- Download
- About 3 GBKali Rolling arm64 installer
- Setup
- By handKali's own installer
- You get
- Kali with Xfceplus SSH from your Mac
- Runs on
- Apple siliconany M-series Mac
Start a workspace from an installer
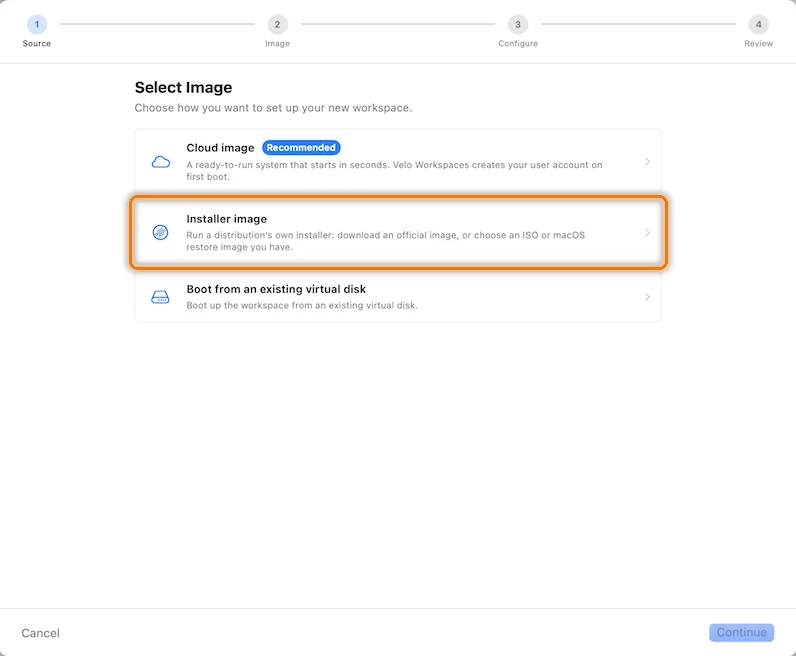
Pick a kind of workspace in the sidebar and click + at the top right of the window. On the first step of the assistant, choose Installer image.
 Click to enlarge
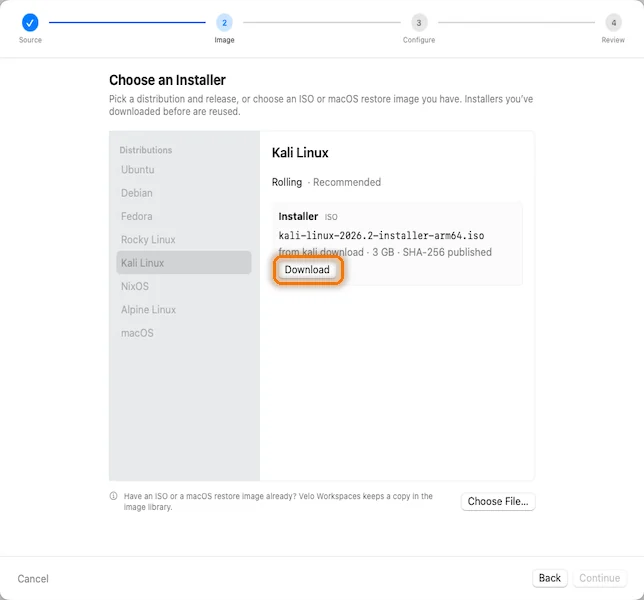
Download Kali Linux
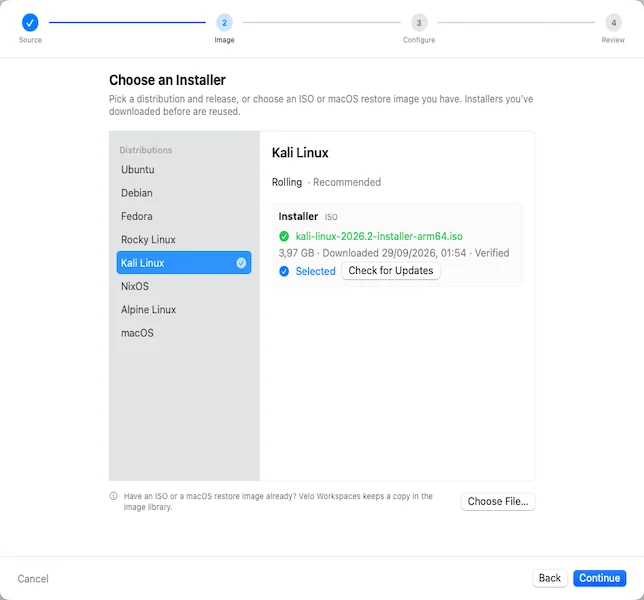
Choose Kali Linux. It's a rolling release, so there's one installer: the arm64 ISO, about 3 GB, from Kali's servers. Click Download, and when it's verified, click Continue.
 Click to enlarge
 Click to enlarge
There's no Automatic installation option for Kali. Its installer is Debian's, which this version of Velo Workspaces can't drive yet, so you'll answer its questions yourself in the workspace's display.
Configure the workspace
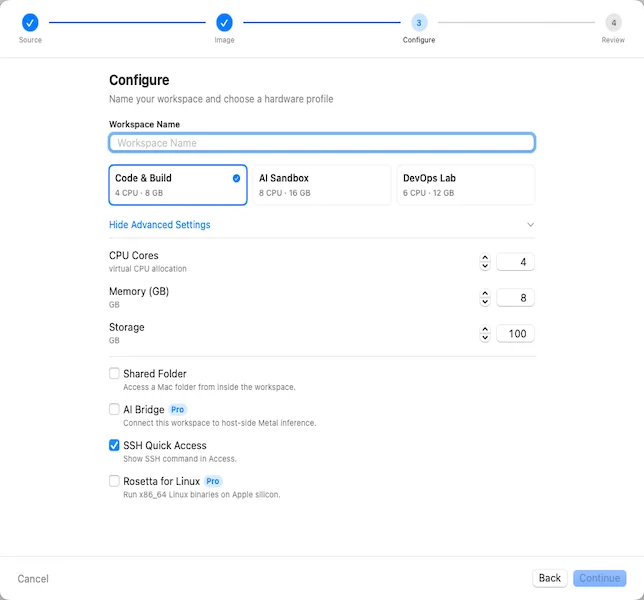
Code & Build (4 CPU, 8 GB) is a good fit. Kali's tools add up, so give it at least 30 GB of storage under Show Advanced Settings; the disk only uses space on your Mac as it fills. Leave SSH Quick Access on, so the Access tab shows the SSH details. There's no account to enter here: you create it in Kali's installer.
 Click to enlarge
Review and start the installer
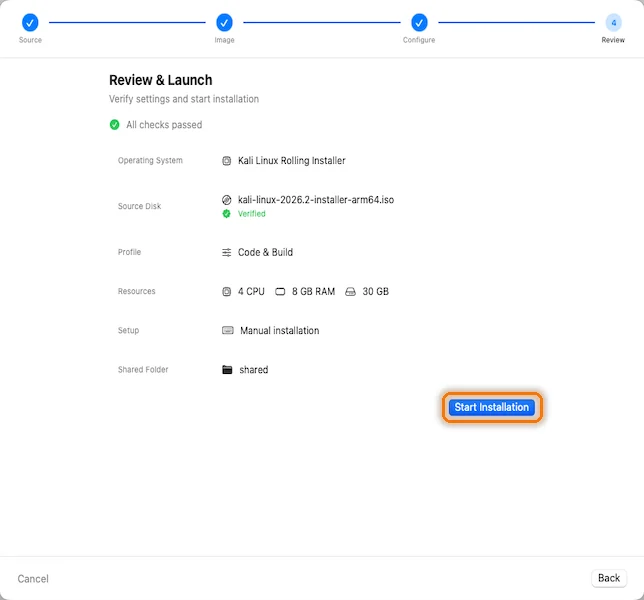
Setup reads Manual installation. Click Start Installation, and the workspace's display opens on Kali's boot menu.
 Click to enlarge
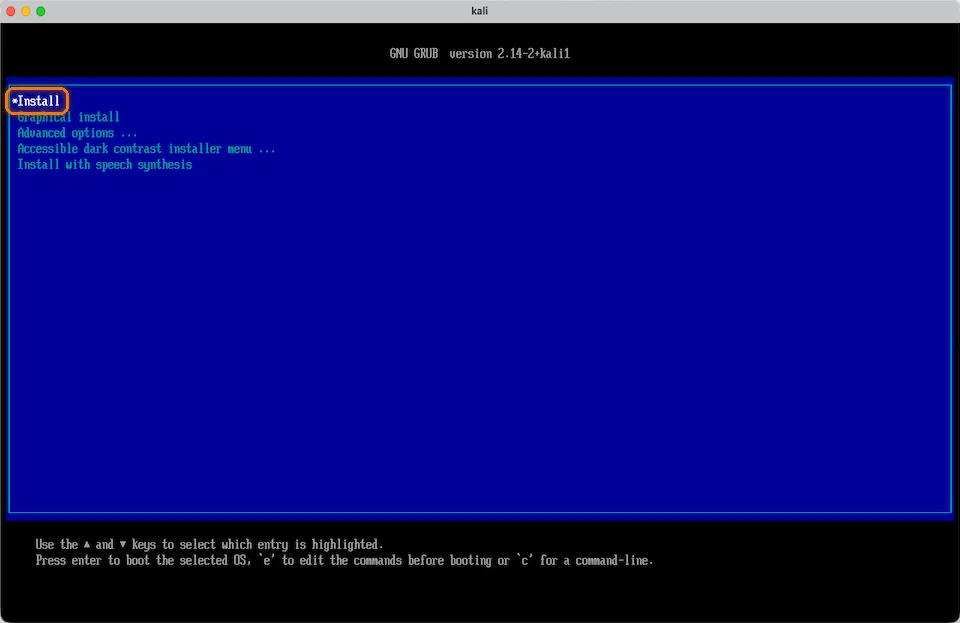
Choose Install
Pick Install for the text-mode installer, which is quick with the keyboard. Graphical install asks the same questions with a mouse. Press Return.
 Click to enlarge
Answer Kali's questions, and pick the virtual disk
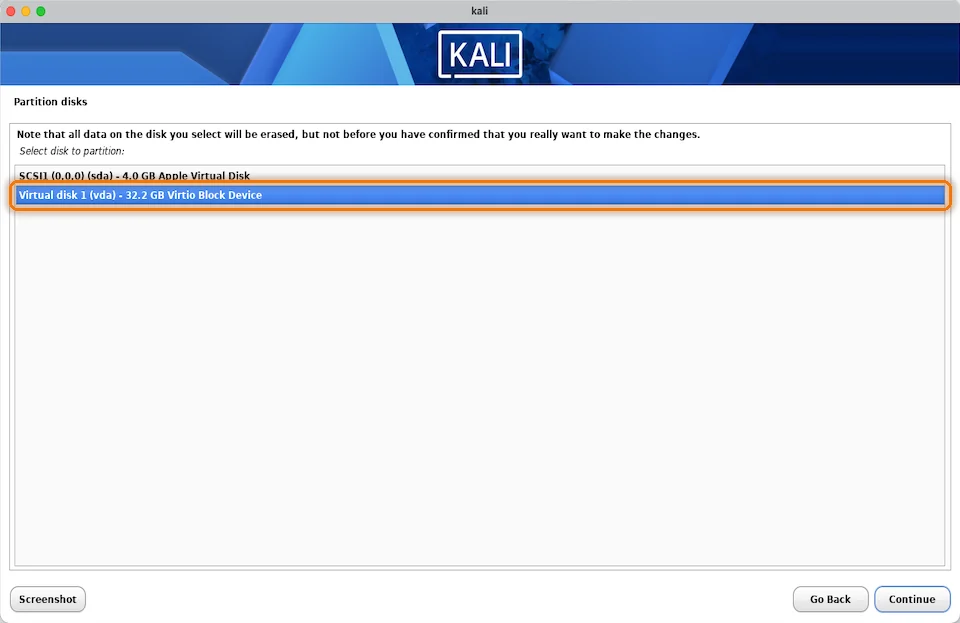
The installer asks for your language, location, keyboard, a hostname, your name, a username and a password. Remember the username: you'll need it for SSH. For partitioning, Guided – use entire disk is right for a VM, and there's only one disk to choose, Virtual disk 1 (vda). That's the workspace's own disk. Nothing on your Mac is touched.
 Click to enlarge
Finish and restart
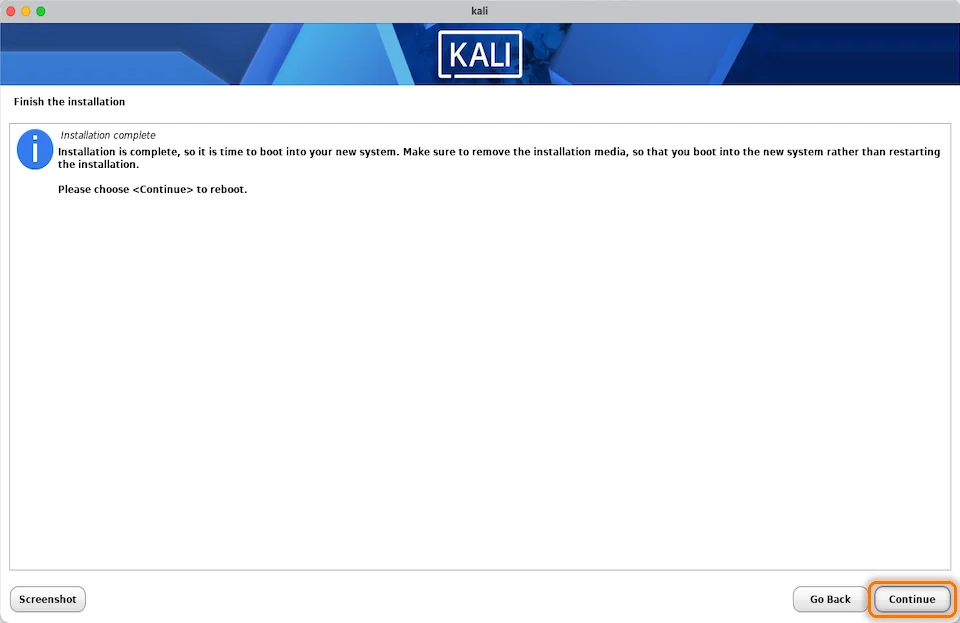
At Installation complete, choose Continue. The workspace restarts into Kali, and you sign in to the Xfce desktop with the account you just made.
 Click to enlarge
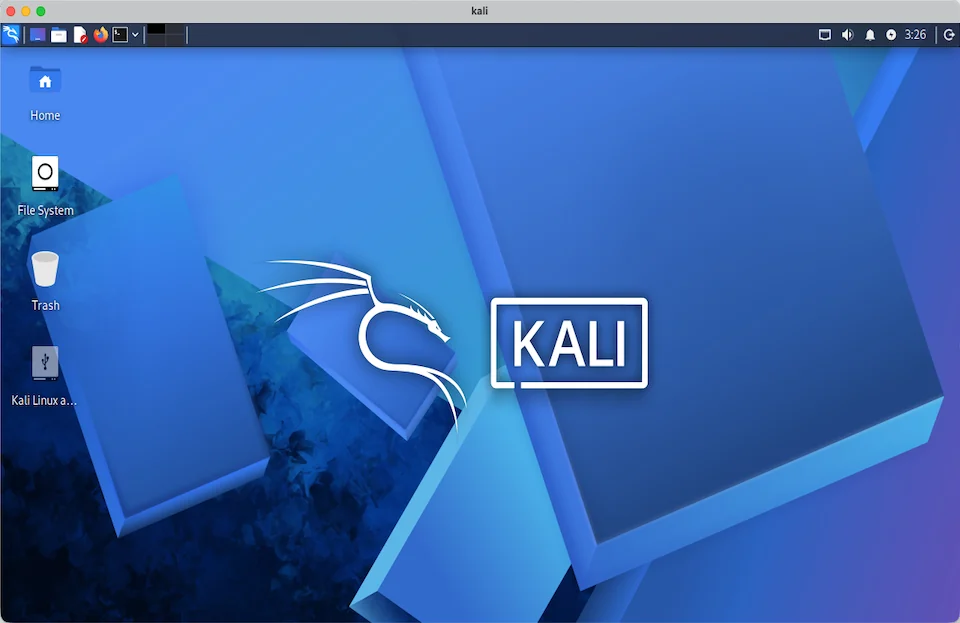 Click to enlarge
Now tell Velo Workspaces the install is done. After a manual install the workspace always shows Finished installing the workspace's OS? at the top, because only you know when the installer has finished. Click Installation Complete.
 Click to enlarge
While an OS is being installed, the workspace uses Large Text display scaling, so the boot menu and installer are big enough to read. Once you click, Velo Workspaces stops attaching the installer and uses the workspace's own display setting from the next start. Stop and start the workspace once to switch; restarting Kali from inside isn't enough.
Turn on SSH in Kali
Kali doesn't run an SSH server by default. Open a terminal in Kali, then install and start OpenSSH:
sudo apt update
sudo apt install -y openssh-server
sudo systemctl enable --now ssh
sudo systemctl status ssh
The status should say active (running). Next, give your Kali account your Mac's public key. In Terminal on your Mac, with your Kali username and the address shown under Host in the workspace's Access tab:
# only if you don't have a key yet; press Return at the passphrase prompts
ssh-keygen -t ed25519
ssh-copy-id -i ~/.ssh/id_ed25519.pub you@192.168.64.2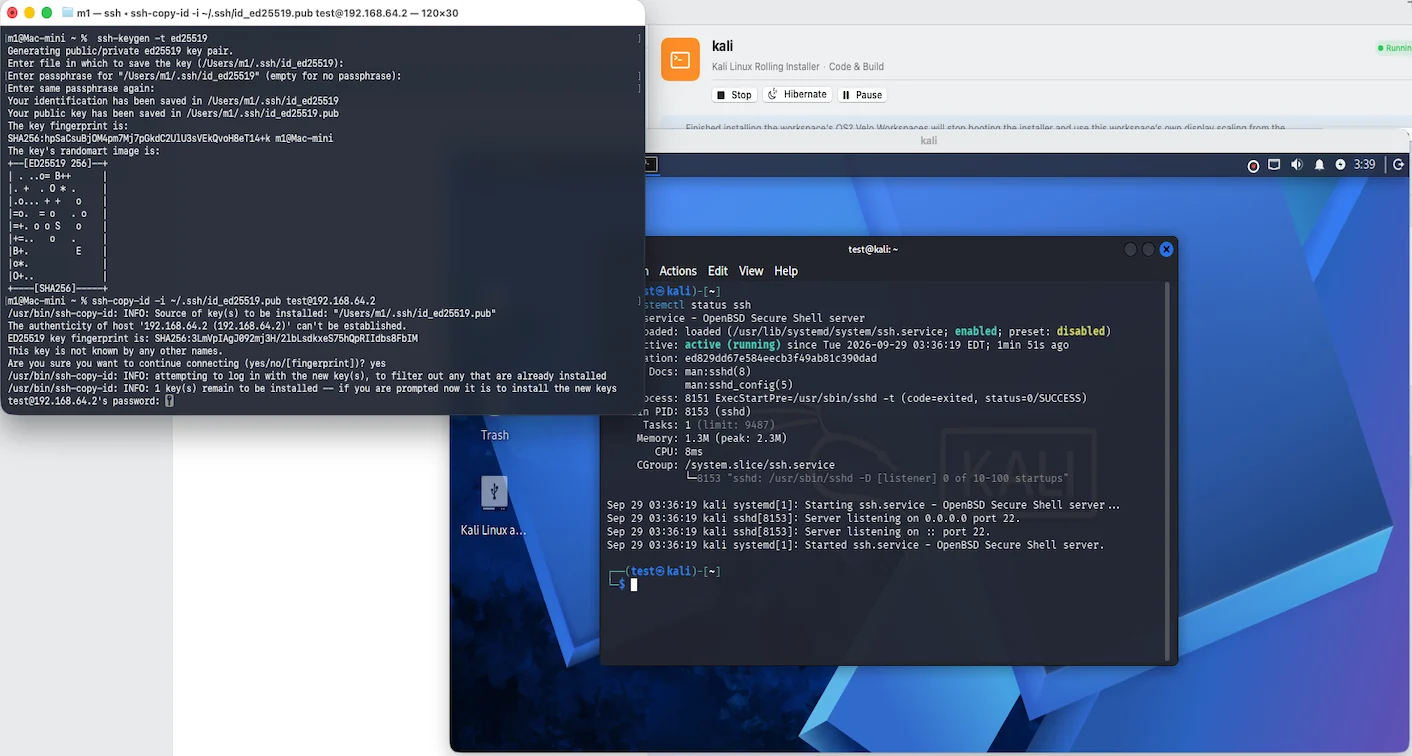 Click to enlarge
Leave the passphrase empty if you'll import the key into Velo Workspaces next. It imports Ed25519 keys only, and not yet ones protected by a passphrase.
Give Velo Workspaces the same key
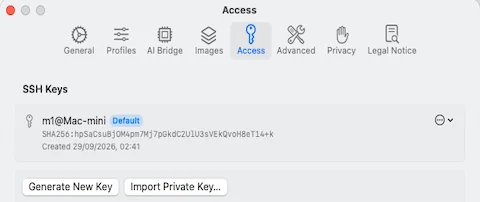
The built-in terminal signs in with a key kept in your Mac's Keychain, so point it at the key Kali now trusts. Click Preferences in the sidebar, choose Access, and click Import Private Key….
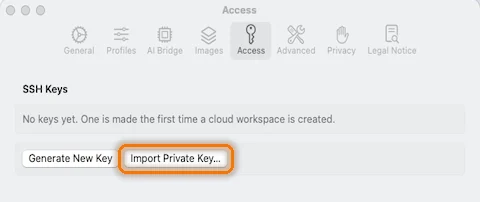 Click to enlarge
Choose the private key, id_ed25519, not the .pub file next to it. If you can't see the .ssh folder, press ⌘ ⇧ . to show hidden files.
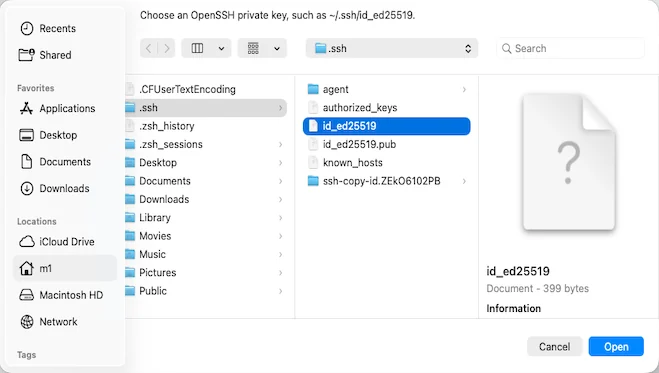 Click to enlarge
id_ed25519, the private key.The key appears in the list. If it isn't marked Default, choose Make Default from the menu beside it.
 Click to enlarge
Check SSH and open the terminal
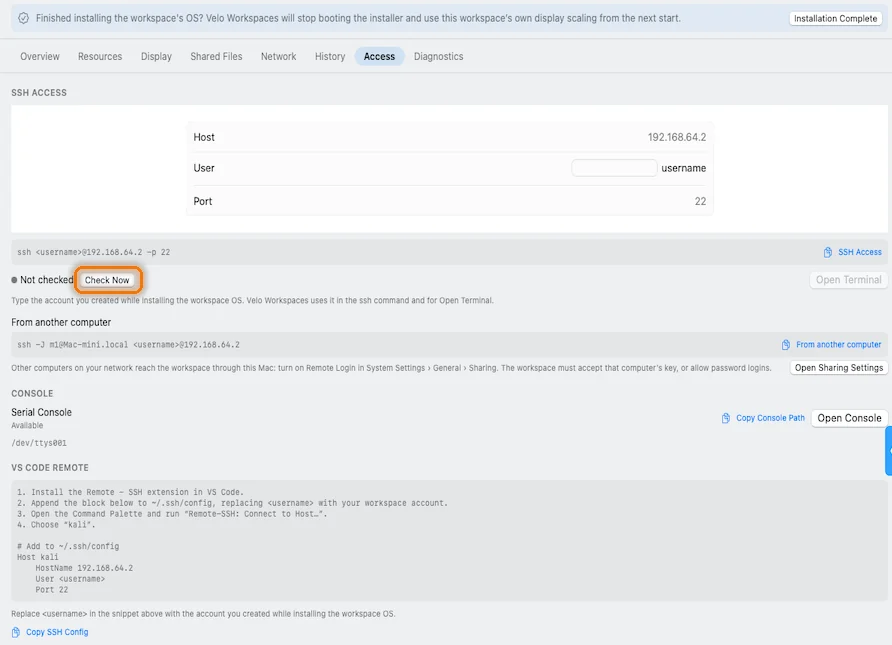
Back in the workspace's Access tab, click Check Now. Velo Workspaces looks for Kali's SSH server and keeps checking until the workspace stops. The status turns to SSH ready.
 Click to enlarge
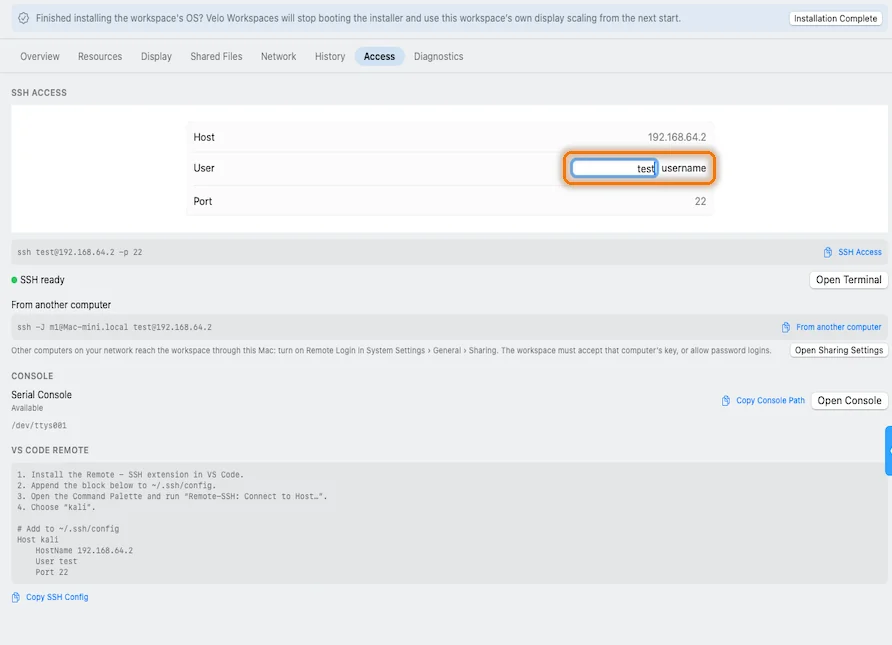
Type your Kali username in the User field. Velo Workspaces uses it in the ssh command it shows, and for Open Terminal.
 Click to enlarge
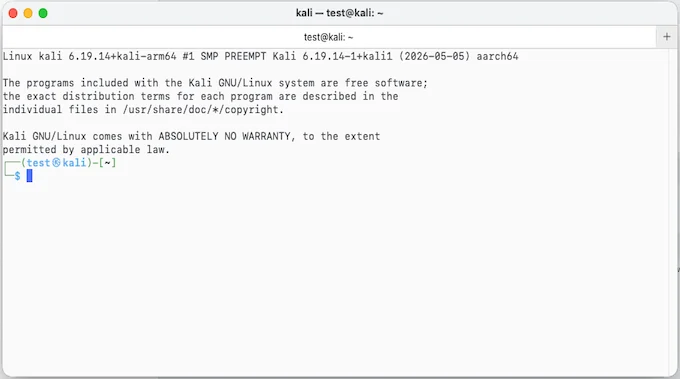
Click Open Terminal, and you're in.
 Click to enlarge
Shortcut: you can skip ssh-copy-id. If Kali doesn't accept the key, Open Terminal asks for your Kali password, then offers Install Key, which adds this Mac's key to your account so the next sign-in doesn't need the password.
Pro feature. The built-in terminal is part of Velo Workspaces Pro, which you can try free for a week. Without it, copy the ssh command from the Access tab into Terminal. That uses the keys in your ~/.ssh folder, so the workspace has to trust one of them: the SSH and VS Code guide shows how.
Networking for a testing lab
The workspace sits behind your Mac's network address translation: Kali reaches the internet and your Mac reaches Kali, but other machines on your network don't see it directly. That's a sensible default for a lab. Kali Linux on Apple silicon explains what it means for testing, and why a fresh workspace per engagement is a good habit.