 Velo Workspaces
- Time
- About 30 secondsonce the image is downloaded
- Download
- Under 1 GBUbuntu 26.04 LTS Server, QCOW2
- You get
- Ubuntu Serveryour account, key and hostname set
- Disk size
- Just type itgrown for you, no qemu-img
Every step below has a screenshot, and you can click any of them to see it full size. Most were taken on an Intel MacBook Pro, which is why the file names end in amd64. On an Apple silicon Mac, Velo Workspaces picks the arm64 image and everything else looks the same.
Start a new workspace
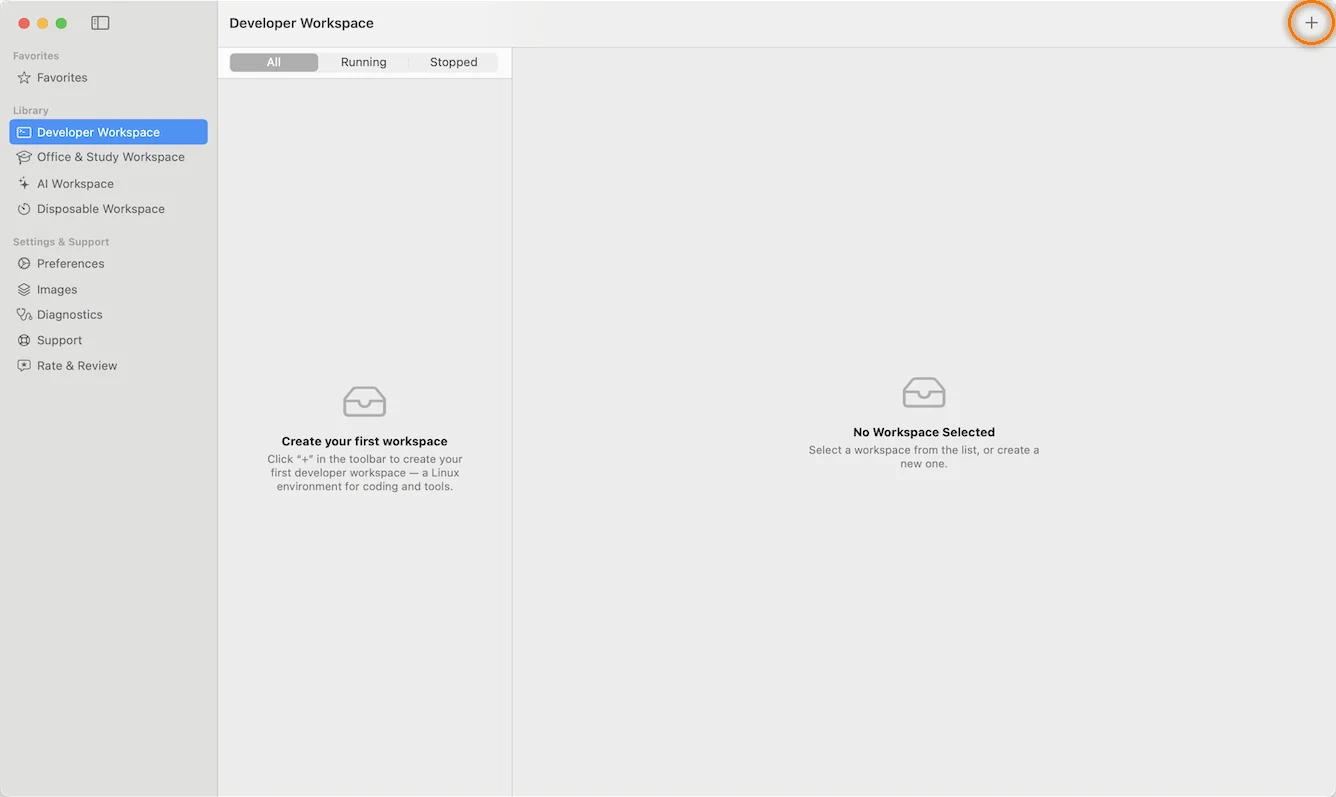
In the sidebar, under Library, pick the kind of workspace you want: Developer, Office & Study, AI or Disposable. The kind decides where the workspace is listed and which hardware profile it starts with; you can change the hardware later. Then click + at the top right of the window.
 Click to enlarge
Choose Cloud image
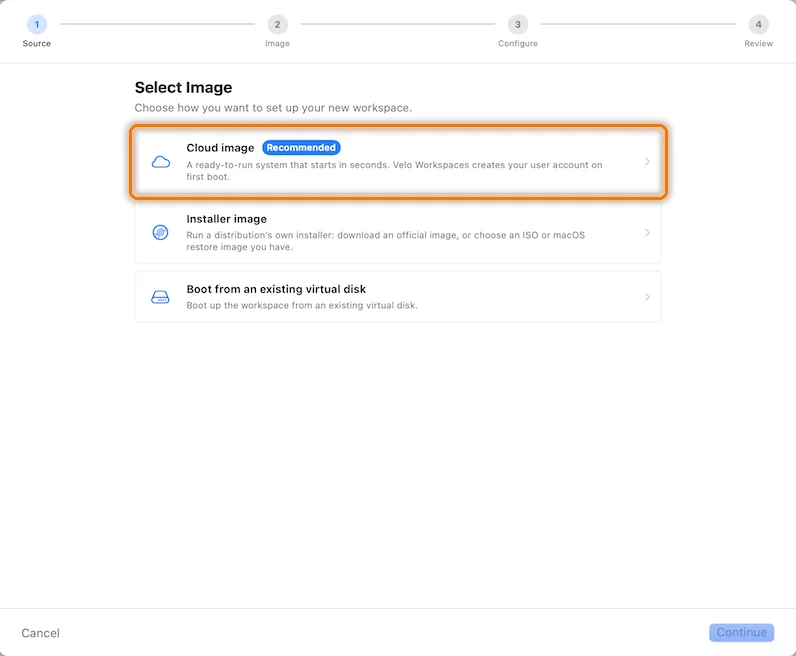
The assistant has four steps: Source, Image, Configure and Review. On the first, choose Cloud image. It's marked Recommended because there's no installer to sit through: a cloud image is an installed system, and Velo Workspaces personalizes it the first time it starts.
 Click to enlarge
The other two choices lead elsewhere: Installer image runs a distribution's own installer, and Boot from an existing virtual disk starts from a disk you already have, including a QCOW2 file from UTM or QEMU.
Pick Ubuntu and download it
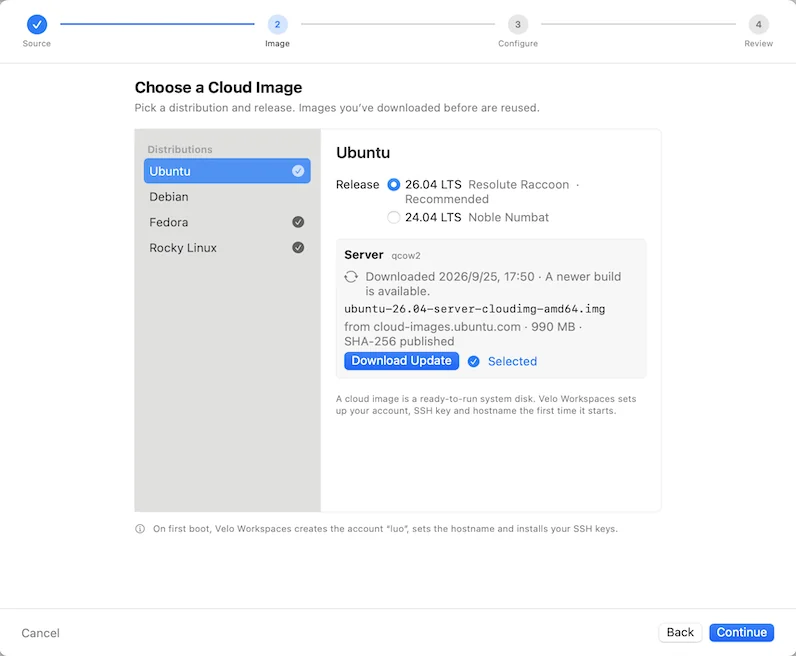
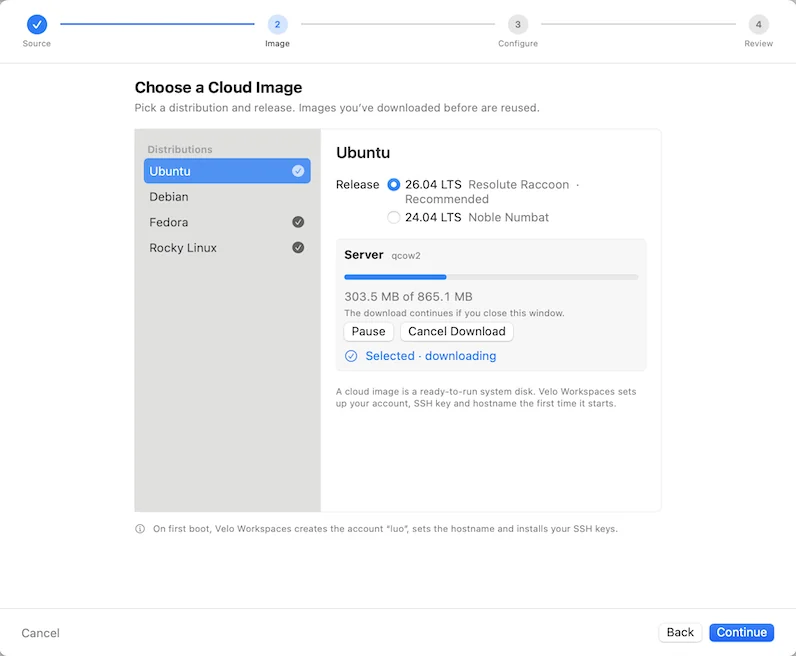
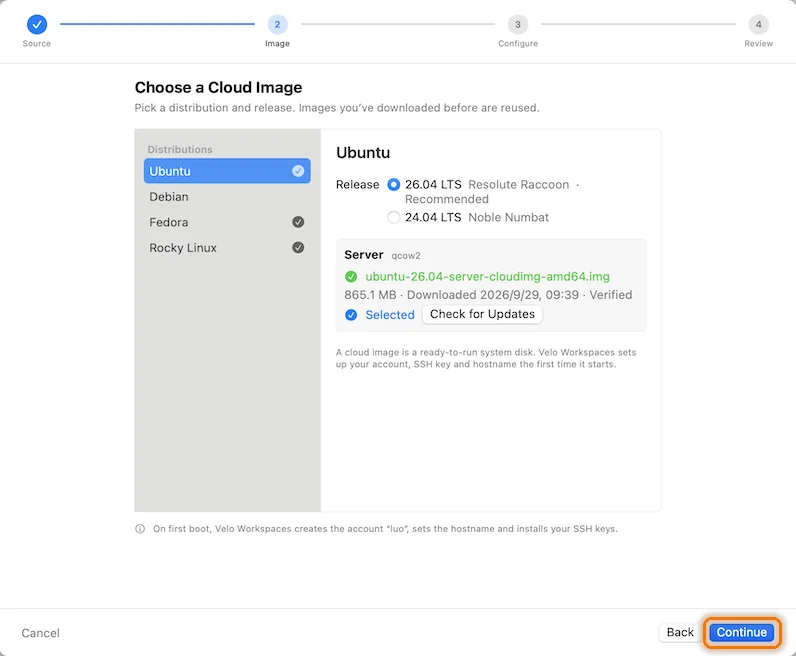
Choose Ubuntu in the Distributions list, then a release. 26.04 LTS (Resolute Raccoon) is the recommended one; 24.04 LTS (Noble Numbat) is there if you need to match an older server. Click Download. The image comes straight from cloud-images.ubuntu.com and is under 1 GB.
 Click to enlarge
 Click to enlarge
 Click to enlarge
When the download finishes, Velo Workspaces checks the file against the SHA-256 checksum Ubuntu publishes and marks it Verified. The image stays in your library, so your next Ubuntu workspace skips the download; when Ubuntu publishes a newer build, this panel says so. Click Continue.
Configure the workspace
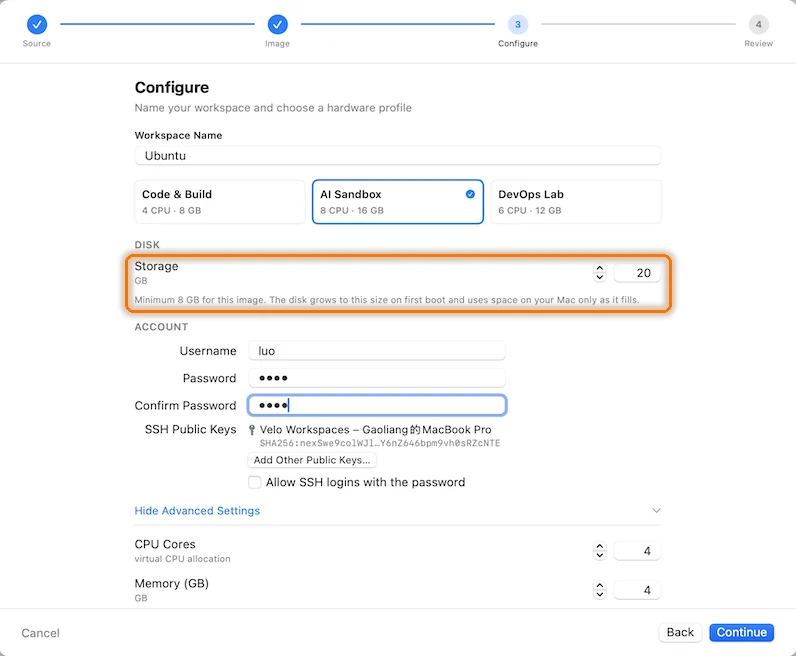
This screen is the whole setup. cloud-init applies all of it the first time the workspace starts.
 Click to enlarge
- Workspace Name is also the guest's hostname: “Ubuntu” becomes
ubuntu. - Profile sets CPU and memory, for example Code & Build (4 CPU, 8 GB) or AI Sandbox (8 CPU, 16 GB). Show Advanced Settings lets you set exact numbers, and turn on a shared folder, AI Bridge or Rosetta for Linux.
- Storage is the disk size Ubuntu gets: type the size you need, anything from 8 GB up. More on that just below, because it's the step that usually hurts.
- Username and Password are for your account. The password is required even if you only sign in with keys, because
sudoand the console ask for it. - SSH Public Keys already lists this Mac's key, which the built-in terminal signs in with. To use Terminal or VS Code with your own key too, click Add Other Public Keys… and paste your
~/.ssh/id_ed25519.pub. - Allow SSH logins with the password is off, so SSH accepts keys only. Leave it that way unless you have a reason not to.
Copy your public key with pbcopy < ~/.ssh/id_ed25519.pub in Terminal, then paste it into the box. No key yet? ssh-keygen -t ed25519 makes one.
The disk size: type it, and you’re done
Ubuntu publishes its cloud image with a disk of about 3.5 GB, barely more than the system on it. Boot it as it is and you're out of space after the first few packages. That's why “how do I resize a cloud image” is one of the most common questions about them, and the usual answer is a chore:
The usual way
# on the host, with the VM stopped
qemu-img resize ubuntu.img 40G

# then, inside the VM
sudo growpart /dev/vda 1
sudo resize2fs /dev/vda1
Three tools, two places, and the right device and partition names to find first. If the partition table's backup header is left in the middle of the bigger disk, fix that before growpart will cooperate.
In Velo Workspaces
Type 40 in Storage.
That's all. The disk, its partition and its filesystem are all 40 GB when you first sign in. Nothing to run on your Mac, nothing to run in Ubuntu.
Here's what happens behind that one field. While Velo Workspaces converts the image, it grows the disk to the size you typed and moves the partition table's backup copy to the new end of the disk, before Ubuntu ever sees it. On the first boot, cloud-init grows the root partition and the filesystem to fill the disk. The disk is sparse, too: a 40 GB workspace uses only as much space on your Mac as Ubuntu has actually written. If you'd like to see every step done by hand, Ubuntu cloud images on a Mac, by hand walks through them with QEMU.
Pick the size you'll need now. Creation is when all of this happens by itself. You can enlarge the disk later in the workspace's Resources tab while it's stopped, but then growing the partition inside Linux is up to you, with growpart and resize2fs, as the app reminds you. Since unused space costs nothing on your Mac, it's fine to be generous.
Review and create
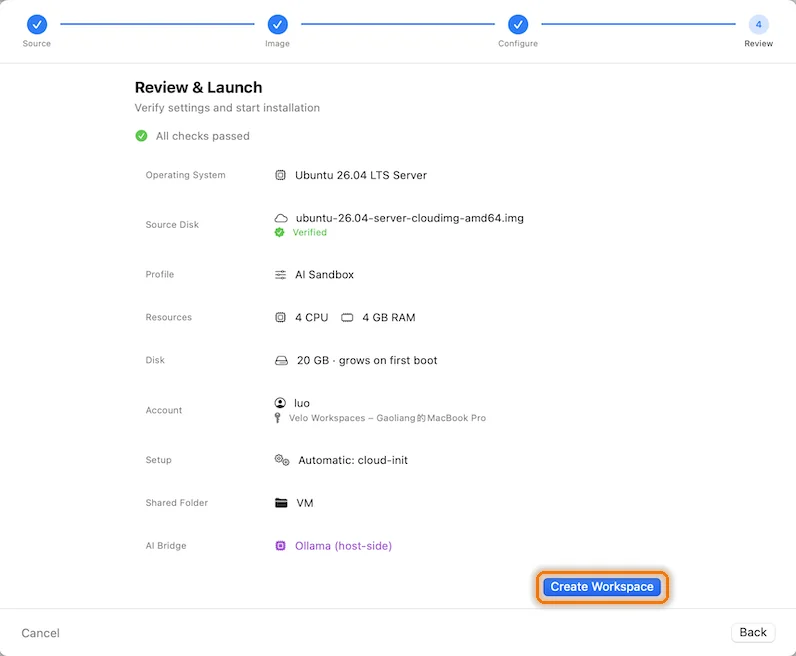
Review & Launch lists what's about to happen. Setup reads Automatic: cloud-init and the source disk shows Verified. Click Create Workspace.
 Click to enlarge
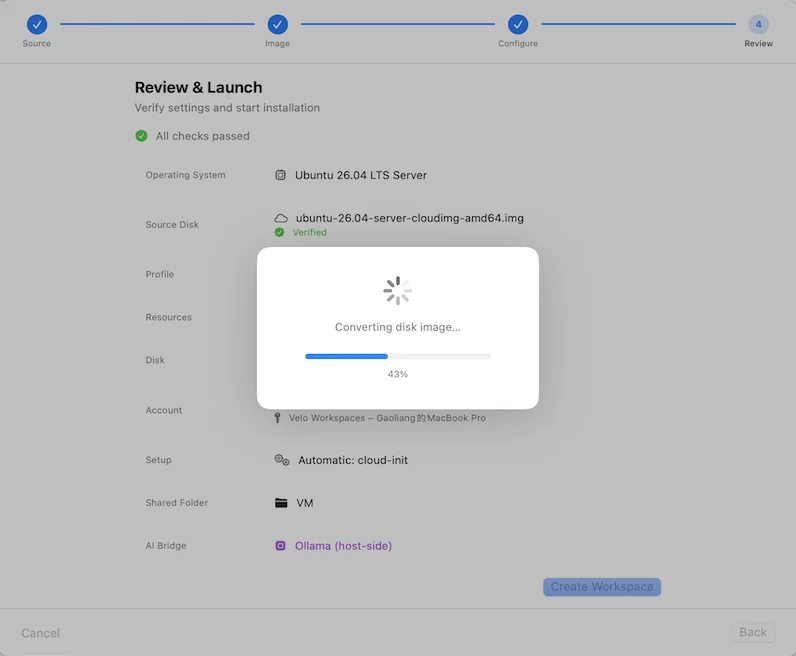
Velo Workspaces then turns the downloaded QCOW2 file into the raw disk Apple's Virtualization framework boots, at the size you chose. It takes a few seconds, once per workspace, and the image in your library stays as it is.
 Click to enlarge
Watch it boot
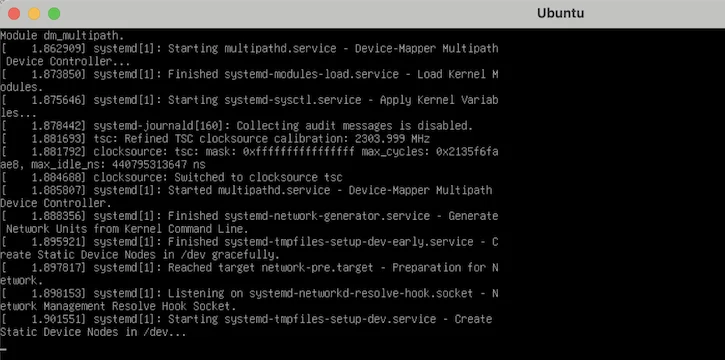
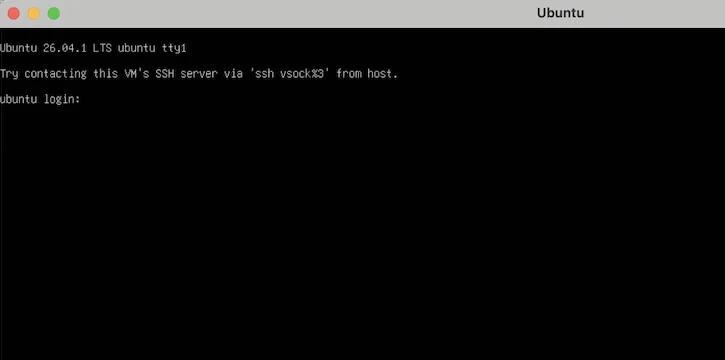
The workspace starts at once and its console opens. The kernel and systemd scroll past, then a login prompt appears. You don't need to sign in here: while it booted, cloud-init grew the filesystem to fill the disk, created your account, set the hostname and installed your keys.
 Click to enlarge
 Click to enlarge
Open the terminal
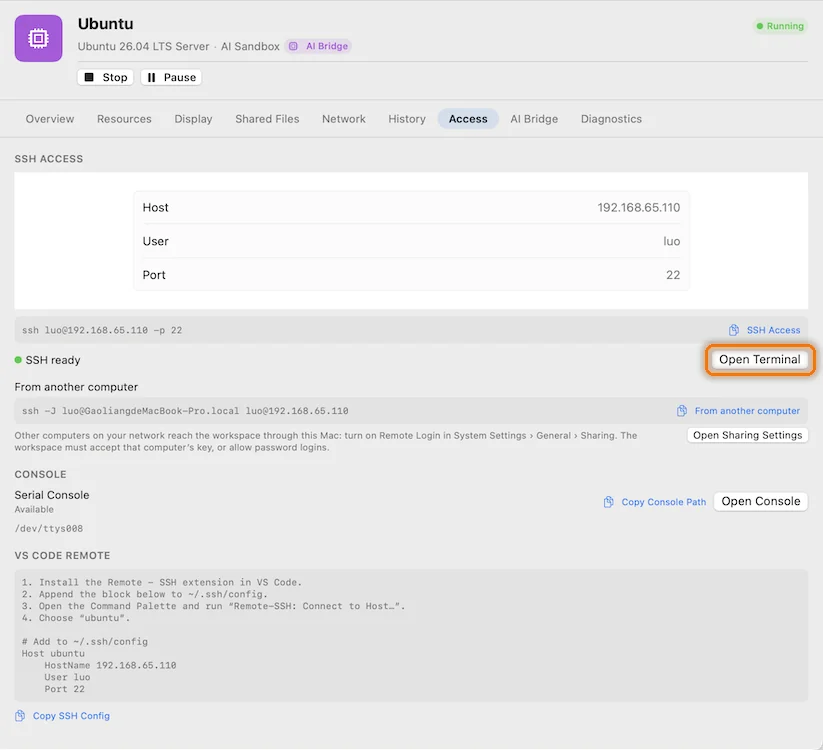
Select the workspace and open its Access tab. It has everything for getting in: host, user and port, a ready-made ssh command, and a green SSH ready as soon as the workspace answers.
 Click to enlarge
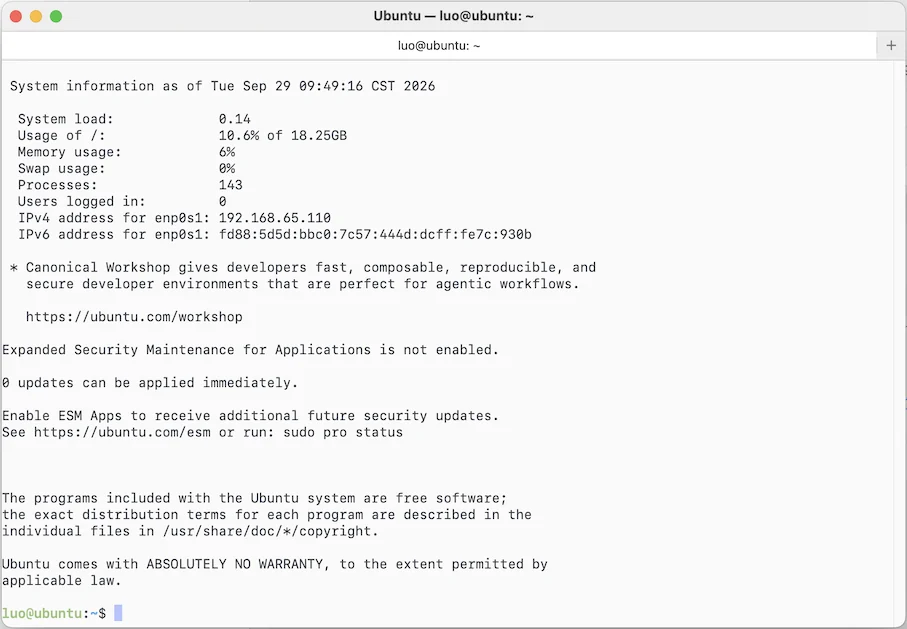
Click Open Terminal. A terminal window opens, already signed in as your user with this Mac's key. It has tabs: + opens another session.
 Click to enlarge
/.Look at the system information Ubuntu prints when you sign in: Usage of /: 10.6% of 18.25GB. This workspace was given 20 GB in step 4, and the root filesystem already fills it, from an image that started at about 3.5 GB. No qemu-img, no growpart. Run df -h / any time to see the same thing.
Pro feature. The built-in terminal is part of Velo Workspaces Pro, which you can try free for a week. Without it, copy the ssh command from the Access tab into Terminal. That uses the keys in your ~/.ssh folder, so the workspace has to trust one of them: the SSH and VS Code guide shows how.
If something doesn't work
SSH ready never appears
Velo Workspaces needs Local Network access to reach a workspace. If macOS turned it off, the Access tab says so and has a button that opens the setting: System Settings › Privacy & Security › Local Network. Otherwise, give the first boot a few more seconds.
Terminal says Permission denied (publickey)
The ssh command in Terminal uses the keys in ~/.ssh, not the one Velo Workspaces keeps in your Keychain. Add your own public key when you create the workspace, or use one key for everything as the SSH and VS Code guide describes.
I need a bigger disk
Enlarge it in the workspace's Resources tab while the workspace is stopped, then grow the partition and filesystem inside Ubuntu: sudo growpart /dev/vda 1 and sudo resize2fs /dev/vda1 on Ubuntu's default layout (check yours with lsblk). Next time, give it more when you create it, where it all happens for you.