 Velo Workspaces
- Your time
- About 2 minutesthe install runs on its own
- Download
- About 4 GBUbuntu 26.04.1 Desktop ISO
- You get
- Ubuntu Desktopaccount, keys and SSH set up
- Same steps for
- Ubuntu ServerFedora and Rocky Linux too
Automatic installation works for Ubuntu Server and Desktop, Fedora Server and Everything, and Rocky Linux. If you want a server, a cloud image is quicker still. The installer is the way to get Ubuntu's full desktop.
Start a workspace from an installer
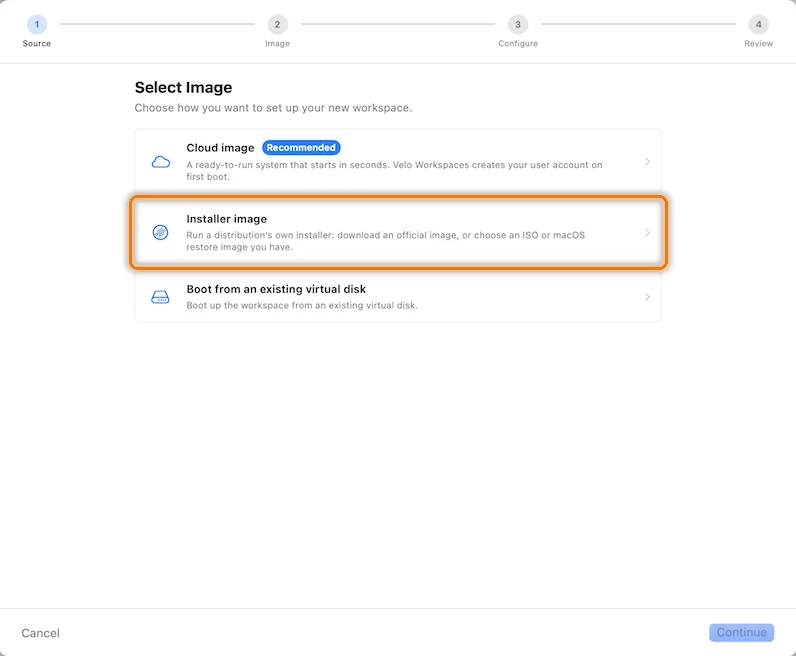
Pick a kind of workspace in the sidebar and click + at the top right of the window. On the first step of the assistant, choose Installer image.
 Click to enlarge
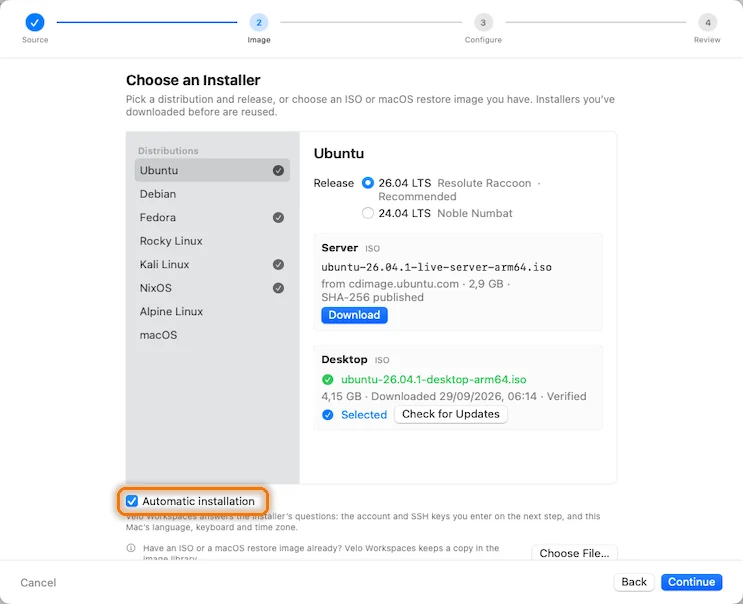
Choose Ubuntu Desktop and keep Automatic installation on
Choose Ubuntu, then a release: 26.04 LTS is recommended. Each release has a Server and a Desktop ISO. Click Download next to Desktop. It's about 4 GB, comes from cdimage.ubuntu.com, and is checked against Ubuntu's SHA-256 list when it arrives.
 Click to enlarge
Below the list, Automatic installation is ticked. That's what makes this hands-free: Velo Workspaces answers the installer with the account and SSH keys from the next step, and your Mac's language, keyboard and time zone. Click Continue.
Set up the workspace and your account
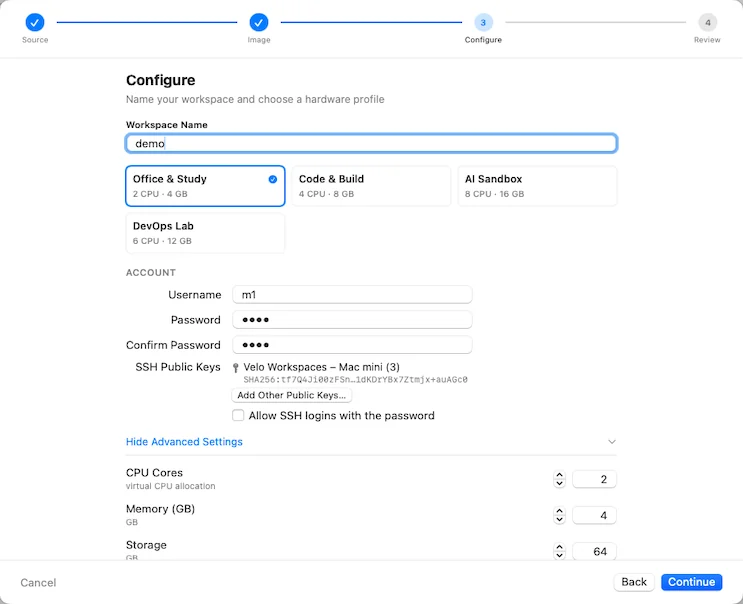
Name the workspace (the name becomes the hostname) and pick a profile. A desktop wants at least 4 GB of memory, and Code & Build (4 CPU, 8 GB) is more comfortable. Under Account, enter the username and password the installer should create. This Mac's key is already listed, and Add Other Public Keys… takes any others you want to sign in with.
 Click to enlarge
Show Advanced Settings sets exact CPU, memory and disk size. The disk is 64 GB unless you change it, and it only uses space on your Mac as it fills.
Review and start the installation
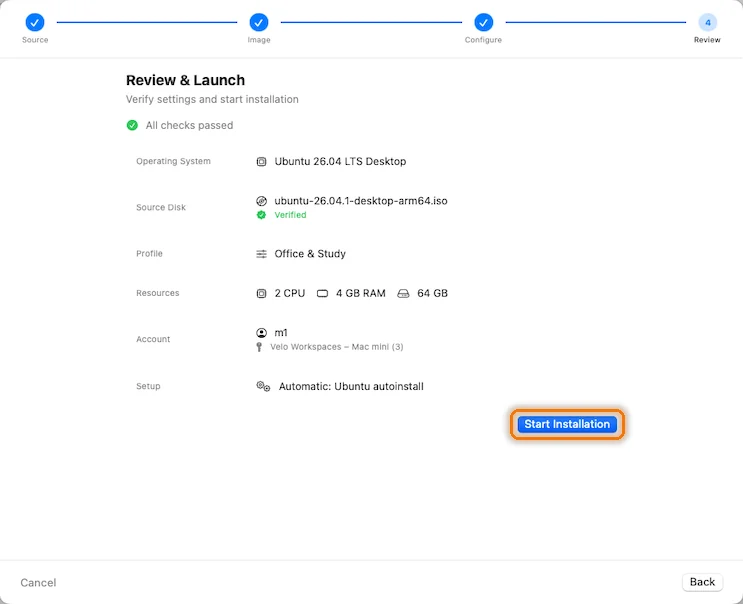
Setup reads Automatic: Ubuntu autoinstall. Click Start Installation.
 Click to enlarge
Let it install
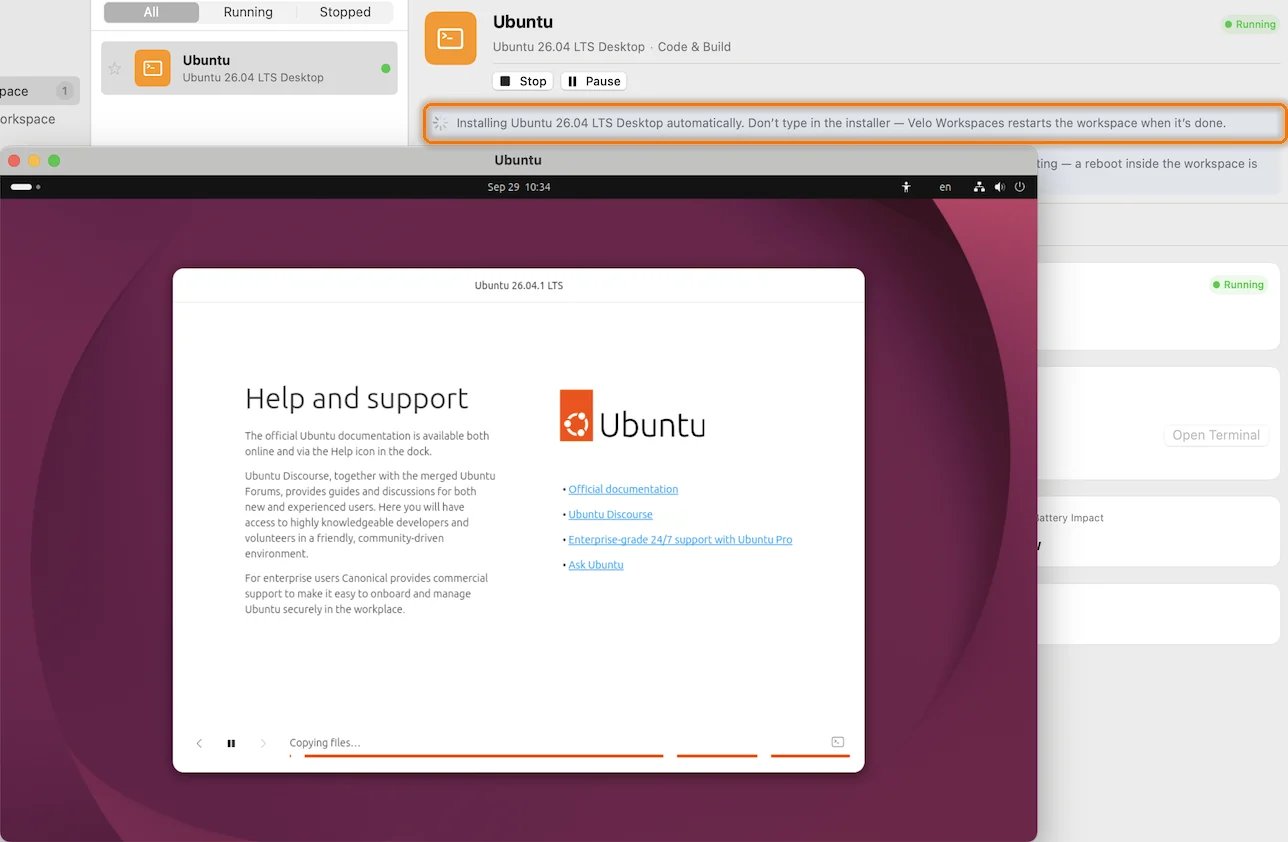
The workspace boots straight into Ubuntu's installer, and a banner in the app says what's going on: Installing Ubuntu 26.04 LTS Desktop automatically. Don't type in the installer — Velo Workspaces restarts the workspace when it's done. Take it at its word and go do something else.
 Click to enlarge
Underneath, Velo Workspaces boots a copy of the ISO with autoinstall on the kernel command line and attaches a small disk holding the answers. That's why Ubuntu doesn't stop to ask anything, not even its usual “Continue with autoinstall?” question. When the installer finishes, it tells the app, and the workspace restarts from its own disk.
Rarely, the ISO can't be prepared that way. Ubuntu then asks once before it erases the virtual disk, and the banner shows a Confirm Installation button that answers for you.
Sign in
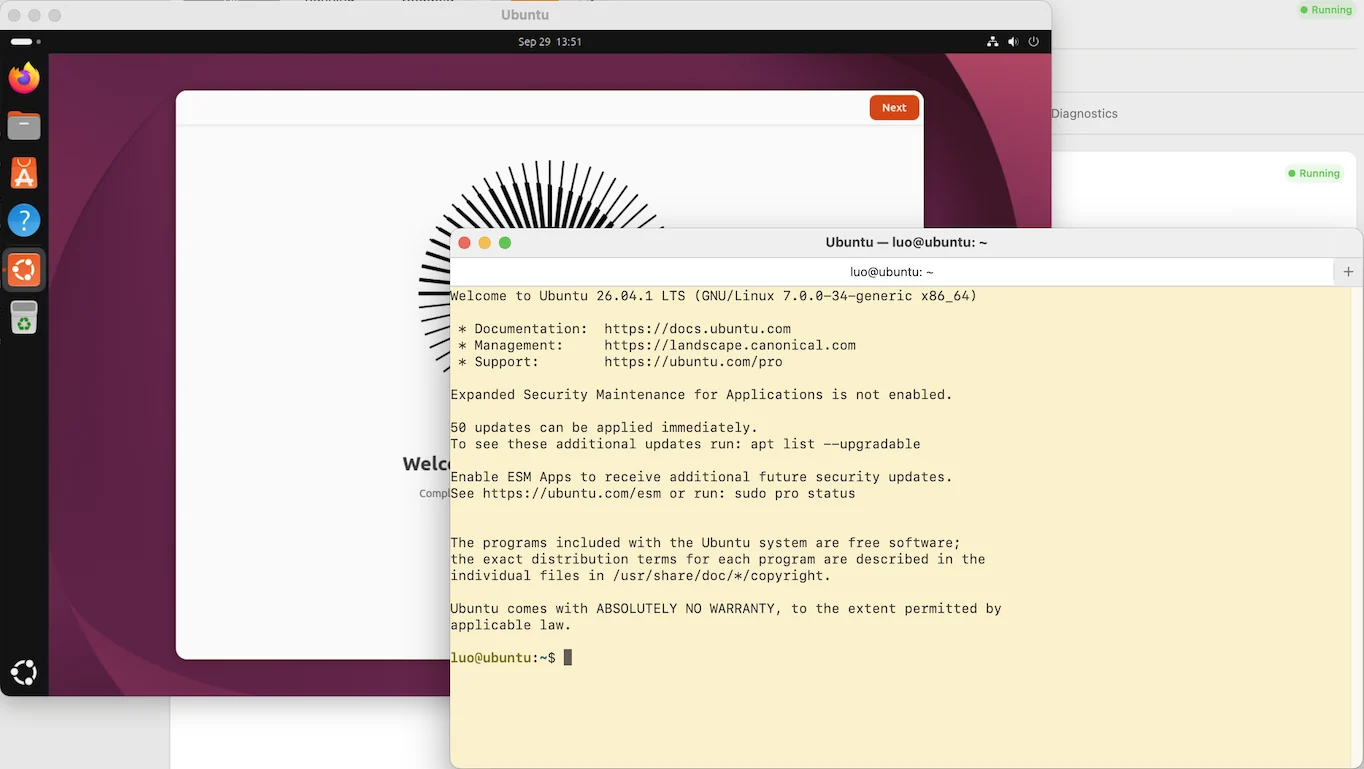
After the restart you get Ubuntu's desktop and its short welcome tour. SSH is already set up with your keys, so the Access tab soon shows SSH ready, and Open Terminal signs you straight in.
 Click to enlarge
Pro feature. The built-in terminal is part of Velo Workspaces Pro, which you can try free for a week. Without it, copy the ssh command from the Access tab into Terminal. That uses the keys in your ~/.ssh folder, so the workspace has to trust one of them: the SSH and VS Code guide shows how.
Good to know
- Server instead of Desktop: the steps are the same with the Server ISO, and you end up at a console instead of a desktop.
- Debian: automatic installation isn't available for Debian's installer yet. The Debian cloud image sets up automatically.
- Server or Desktop? This comparison helps you choose.